Tuesday, February 24, 2015

The Wreath Conundrum

I love wreaths. Like really love them. I would easily change out wreaths every two weeks if I could and would easily like to DIY them all. But, sigh.
There is only one little problem with DIY’ing every single wreath out there… storage. I live in a house that was build 100 years ago. Okay, so not really, but for real… where the heck do you store wreaths for every occasion? Every holiday? Every sports season? (I have no clue, but if you have any ideas then I am all ears!)
So, I set out for a way to make one wreath work for all holidays, occasion, sports season, etc. And, it turns out it is not an easy feat. However, I forged on and made a trip to my local HobLob (aka Hobby Lobby for those of you who are not HobLob snobs like me! Ha)
I found a simple solution to my problem and it came to me in the form of a twiggy wreath.
Ahhhhhhh.
It was like a light bulb came on. So, I picked up the twiggy wreath and headed to the floral department. If you have read any of my other post, you know that I am a cheapskate. Like, for real. If it isn’t on sale then I am probably not even going to look it over. But, sometimes I see things on sale and am still like “nope, I am not paying that for that!” And, that is what happened to me and the floral department.
I realize these flowers are on sale, but still. The plan is to downsize décor after use and I couldn’t bring myself to pay $5 for something I was planning to throw away in a few months. So, I decided that Dollar Tree fake flowers would suit me fine for this project.
The twiggy wreath was about $8. It was not on sale that day, of course, but I had my 40% off coupon so I purchased anyways. (My mom would be so proud of me for purchasing something originally not on sale!)
http://www.townandcountryshuffle.com/wp-content/uploads/2013/04/spictures-004-1024x764.jpg
photo via pinterest 
So, here is the best part about twiggy wreaths…. NO GLUE REQUIRED! Yes, that is right. Think about it.
If you cut the flowers away from the bundle with a little stem then you can just arrange the flowers in the wreath WITHOUT needing any glue… therefore, you can reuse the wreath time after time! Win!
You can also use zip ties, bread ties, fishing wire, etc. to add bows, letters, state outlines, DIY snowflakes… the list could go on and on and on. Seriously.


Here are a couple of examples of what I have done so far. The first one is what I did for the fall. My pink door can be a little… overwhelming for the faint at heart so I tried to keep my fall décor to a minimum because let’s face it… I LOVE fall décor. I zip-tied a orange burlap bow and arranged the yellow thingy as best I could and left it at that.


Now, for my pink flower wreath I went a little crazy. I actually had the three larger flowers leftover from another project and decided to use them this go around. They were from HobLob and I couldn’t think of any place else in the house where I would use them so I went for it. The other flowers all came from Dollar Tree. Most of the DT flower bundles had a least four or five flowers per bundle so cost wise it was a cheap DIY! I had the “B” already from my old bedroom colors and since it had been hiding under my bed I thought I would put it to good use. (I also got the letter at HobLob and then modge podge scrapbook paper.) I tied a bow in some pink tulle and hung it from the wreath hanger so it looks like it is more attached than it really it.


I would be lying to say that I didn’t already have plans for my next wreath decorations, so be sure to follow @brenna_davis on Instagram to see upcoming projects… including pallet gardens, pallet furniture and my Fourth of July wreath!


Saturday, February 7, 2015

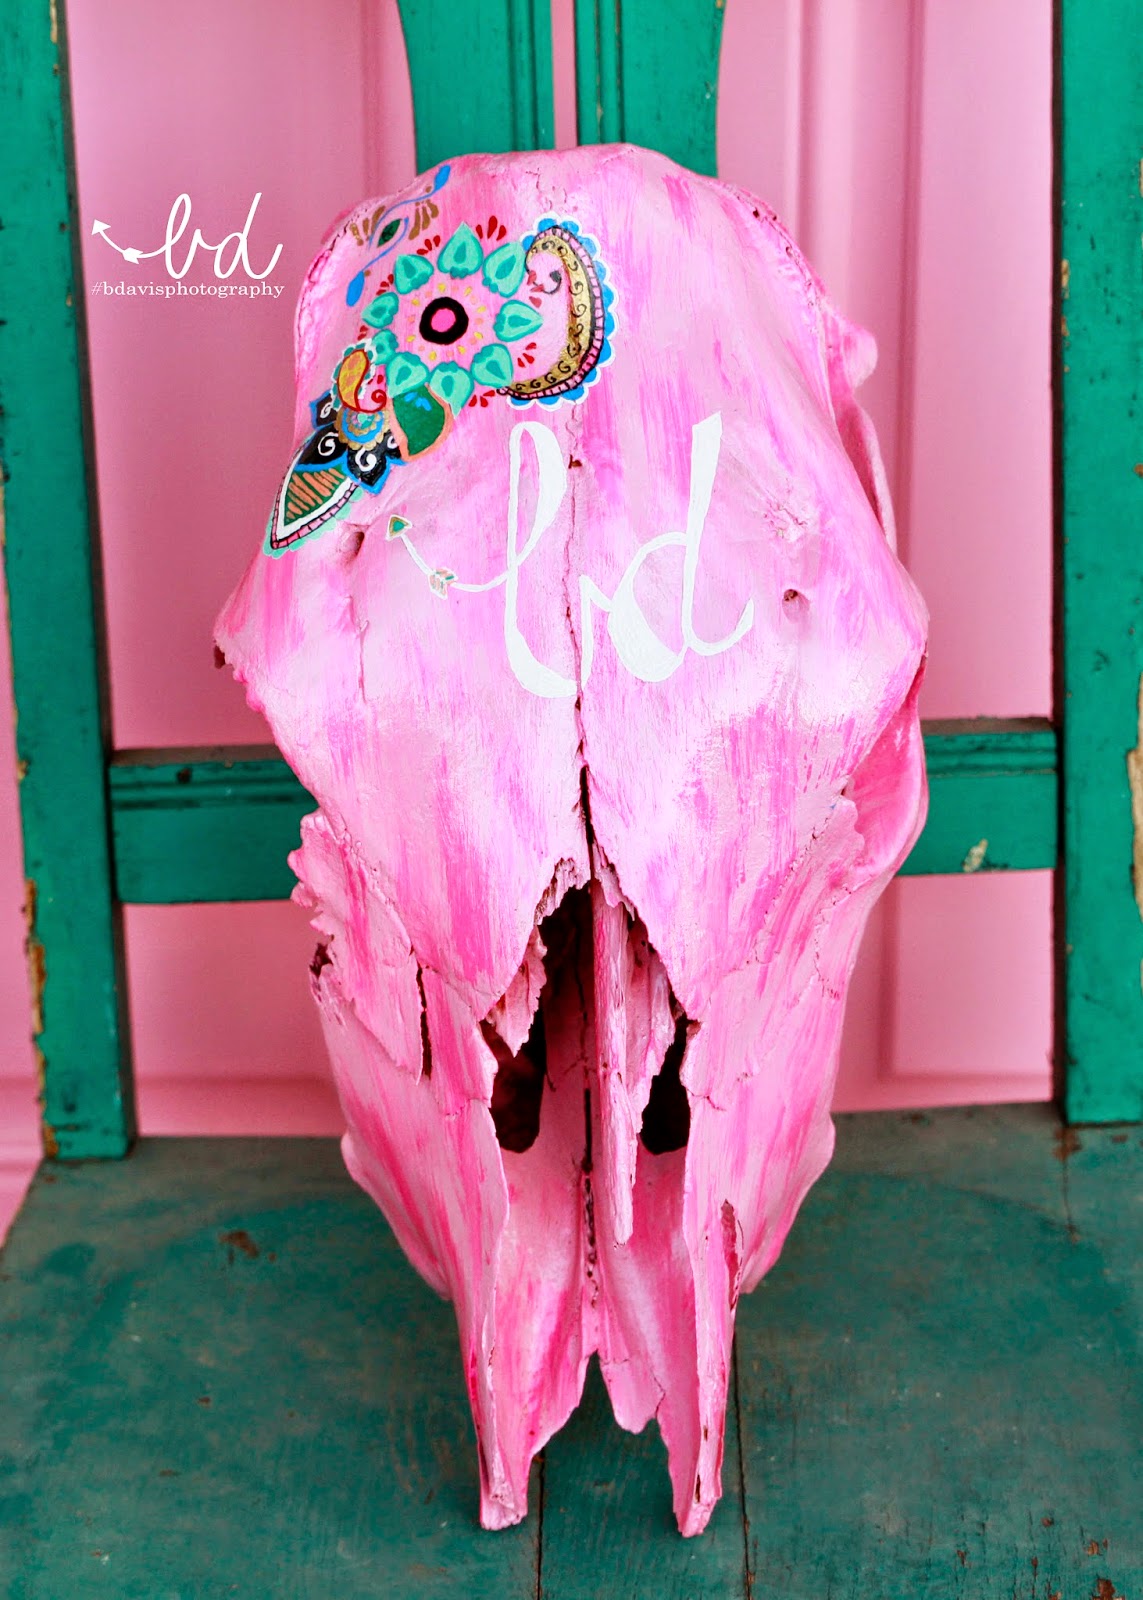
The Most Perfect Skull. Ever.


My super talented friend, Kelly, painted this for me... complete with my logo and most favorite colors! 

I absolutely love it and can't wait to find the perfect place for it! Ahhh, so excited! 
Thank you so much, Kelly Jo! 

Like KJ's Old Bones on Facebook to see her awesome work and order your own one-of-a-kind art! 


Sunday, January 18, 2015

Christmas 2014

I realize it is January, but between a lot of random things happening... I somehow forgot about Christmas cards! And, much more than just cards. I forgot about the Lucy/Brenna Christmas photo. 

Honestly, we attempted more than I would like to admit. And, I sifted through a TON of photos before realizing I had better luck herding cats than getting Lucy to look at the camera. 

Pictures are much harder than one would expect. Lucy is not a lover of photos. She hates them actually. we could take 100 and maaaaaybe one would be okay! Literally. She yawns or closes her eyes or is looking away or looking down or anything to avoid actually looking at the camera. 

So, this year I decided to forego an actual "good" Christmas photo because it was NOT happening... so Merry belated Christmas, my friends. 


Sunday, January 11, 2015

Blanket Scarf Life Hack


Have you seen those super cute oversize flannel scarves? You know the ones that are like $60 and are not much more than a large square of flannel fabric? Well, today I am about to show you the easiest life hack of all times and save you some serious dollars!

All you need is a piece of flannel and a pair of scissors. It is really that simple!
I found a coupon to Hancock Fabrics online and ended up getting three flannel prints for around $14! Just Google for coupons! Hobby Lobby also has flannel, but my local Hancock’s had more of a selection.

Anyways, you will need about a yard of fabric! The yard will give you a rectangle, so you will need to cut it where it is more of a square shape.  (However, I didn’t cut mine at all. I pretty much left it the way it was and started wearing it almost right after I got the fabric! Haha) Depending on the width of your fabric you could have them cut it less than a yard to be a perfect square. However, the excess you cut off could be used for more fun crafting. (More flannel tutorials to come!)

The flannel will fray slightly on the edges, but I am fine with it so I just let it go! But, if you aren’t in to that sort of thing then just grab some Fray-Check when you are getting your fabric and apply it to the edges!

After you have your fabric laid out (and edges Fray-Checked) all you have to do it start folding. I laid mine out on the floor to start with and then folded two opposite corners together to make a big triangle. Next, take the two points and wrap it around your neck so it is secure. Once it is in place, just start fluffing and pulling and tucking until you get the desired look you are going for.

And, there you have it. A super simple and super cheap flannel scarf!

A special thanks to Shae for being the first to test my tutorial and sending me cute modeling pictures!! 


My frist flannel purchase! 

My second flannel purchase and sadly not my last!

Tuesday, January 6, 2015

Finally A Corner Desk

I love sitting at my desk. I do, I really do. However, it rarely (if ever) happens.  

This is partly because my dog hates me sitting at my desk. Seriously. She won't leave me alone if I am sitting in my desk chair with my feet propped up on my desk sipping hot chocolate. Every 5 seconds she jumps up on my lap and stares me down. It is only slightly annoying... and, slightly the most adorable thing ever. 

And, partly because my desk area was so boring. So blah. So not inspiring in any way not even the slightest. So, I resorted to sitting anywhere else but at my desk. Like where I am at this very moment...  my bedroom floor. (And, I have zero answer for why I decided to sit up camp here for the night!)

So, I took the first weekend in January to sit at my desk. See that was one of my "new year, new me" saga items that I wanted to resolve. Use that huge thing that sits in the corner taking up space and not use it for a catch all for items that I don't know what to do with. 

I cleaned that bad boy completely off. Yep, I put the tape measure back in the hall closet, put up my shoes, threw away the plastic bags, vacuumed up the mountians of glitter from Christmas craft projects, put the Christmas cards back in the cabinet because lets face it those are a little more than late and finally found that pesky lens cap that I thought I had lost back in October.

This desk is so much bigger than I remembered it being! For months, I had been planning on what I could do with the space above the desk. I toyed with the idea of huge canvases of photos I had taken or massive shelving, but decided to go with a more eclectic vibe. And, I really didn't know where to put some of the things I had been collecting hoarding for years if I didn't put them above my desk.

So, I pulled out every piece of decor I had down at my new place that I could find and started brainstorming. I don't think I am anywhere near done yet, (there are still things that need to be moved a little or added), but I am already loving it a little more everyday.

My brother got me the marquee arrow for Christmas last year and I hadn't even hung it anywhere until I moved to this house. The gold cross was actually a silver cross that I painted using metallic spray paint. I used it on the "B" and "D" letters too! If you love gold then you should really try this paint. It is awesome. I even used it on some of my Christmas tree ornaments, as well.

Most everything came from my beloved Hobby Lobby except for a few pieces that were given to me or I found at antique stores. The cameras on the shelf came from my grandmas and the one on the desk is my dad's that I can't wait to try out this fall! (I am a little scared of the film though!)

My desk reno has inspired me to work more on my bedroom too! I think that is why I set up shop in here tonight is because it is so cozy and warm. I did a little rearranging that made a ton of difference, not to mention my new cool metal arrow and marquee "B" letter! (I love arrows and the letter B if you haven't noticed!)

There is still plenty of work left to be done, but I think it is so important to have a work environment that is inspiring to you ---not to your neighbor, best friend or brother's best friend's cousin twice removed's dog-- to you. Whether you are a full-time employee or an at-home business owner figure out what inspires you and go for it. It could make all the difference in your work quality, work flow and productivity!


Friday, January 2, 2015

Project 365-- Day Two.


Some days it is just about memories. And, today is one day that I sit back and think of all the good memories, funny memories and the ones that make me smile every time my low fuel light starts flashing. 


Thursday, January 1, 2015

Resolutions 2015-- Day One.


Resolutions haven't always been my thing. I always say I am going to do these grand things and never really get around to doing any of them ... partly because I am a tad bit of a procrastinator and partly because I forget if I am not looking at it everyday. 

I haven't really came up any type of solution, but I am going to try two new things this year. 

First, I am going to make a "Monthly Goals List." This won't necessarily be anything like "quit drinking pop," but rather a list of things I want to accomplish. Like sending letters to friends, making new crafts and finishing old projects. I figured if they were monthly then it would be easier to accomplish. Tomorrow, I am going to work on making a frame to sit on my desk to keep my monthly goals list right in front of me so I don't have the excuse of "forgetting!" 

Secondly, I am jumping on the 365/52 photography project. I read about something like this a few months ago about a photographer who took at least one picture everyday to help improve her photography skills. I loved this idea and I am going to give it a try. I am going to *try* my very best to use my big girl camera for each one, but I might have to resort to my phone if all else fails. I can't promise my life is that interesting, but I will give it my best shot! But, I will warn you... Lucy will more than likely be the star of this project. 

(I will be posting my project photos on my personal Instagram account if you would like to follow along!)